This is going to be my first technical post, so I will try to provide as much details as I can in order to try explain how to build an SD-WAN cluster. To build this cluster, I will be using three Cisco vManage, two vBonds and four vSmart, and I decided to divide this explanation in three sections. Each section will cover how to build the cluster, and create a high redundancy environment in our entire SD-WAN infrastructure. I will starting with the vManage, then with the vBond and finally with the vSmart which it will be divide it in two post, the first one, will explain how to add all the vSmart to the vManage, and then how to achieve the high redundancy facing to the vEdge, with that being said.. Let’s start…
Probably is going to be good idea if I analyze the most important guidelines that Cisco provide us to build this cluster:
- vManage cluster consist in at least three devices or controllers, with this number of controller participating of the cluster (of Couse you could have more if you want) we will avoid issues like split brain, also we should have in consideration the kind of persona profile selected at the moment of first boot when we are installing the software on the controller. Remember during the first vManage boot, we are able to choose which persona (characteristics) will have the controller that we are deploying, this is important because we can only have:
- Computer + data: (Application services, statistics, configuration, messaging and coordination), this can be used in standalone mode as well as in cluster mode, also this mode should be used by controller in our SD-WAN environment.
- I will go for this option, since all the three vManage that I deployed are configured as Computer + data persona.
- Compute: (Application services, configuration, messaging and coordination), this node can’t operate in standalone mode and must be part of a cluster.
- Data: (Application services and statistics), this node can’t operate in standalone mode and must be part of a cluster.
I am not going to extend on the different vManage cluster combinations or this post will be longer than I am expecting.
- All the vManage should be located on the same data center and all of the participants should be under the same subnet, probably this could skip if we use some technology to extend our L2 domain across our environment in order to achieve some geo redundancy.
- To complement what I said above, Cisco recommends to have no more than 5 ms of latency between all controllers
- Cluster IP should not be reachable externally.
- Don’t use DHCP on the interface used to build your cluster.
While I was looking for more information about how build the vManage cluster I could find some information that confused me a little bit, for example from the version 20.9.1 you will have an error if you use the same interface used as a transport interface to build the cluster but I am using the version 20.9.5.2 and I build the cluster using the VPN 0 interface and I didn’t have any issue.
Very well…. Let’s started showing what is the configuration and what is the topology that I will be using for the three vManage, as you can see below, I have an straightforward configuration all three vManage or at least the most important configurations that we need to build the cluster under the system configuration, also the as I said before I used the VPN 0 to communicate all the three vManage.
| SYSTEM CONFIGURATION | VPN 0 CONFIGURATION |
system | vpn 0 |
system | vpn 0 |
host-name vmanage-3 | vpn 0 |
The all the configurations and the basic topology in place we are ready to join more vManage controllers to my current vManage. First we need go at the Cluster Management section, over there we will be able to see all the vManage controllers as well as the services running on each the controllers in our cluster.


On screenshots above, you will notice that the controller is using the Localhost IP address to identify itself, we need to change that prior to add more controllers to the cluster, if we don’t change the IP address, our vManage will give us a beautiful message saying “Configure IP address on Local Device

So, to change the IP address we just need to edit our current controller using the three dots located at the end of our controller description. Under the Edit vManage windows that will pop up, we will be able to not only change the controller IP address, also we will be able to choose the Node Persona option that we used on the controller that we will add to our cluster.
- Something that I couldn’t find is if I deployed (the controller that I am going to add) as Compute + Data persona and here I decided to select the Compute option, that new controller will be enable only the Application services, configuration, messaging and coordination services.
- Also I will not enable the SD-AVC options since that is not the scope of what I am doing now.


Be careful!!! make this movement will reboot your controller, also is going to be good idea if could take all the backups, screenshots, configurations and everything that you need in order to keep your ASS safe as much as you can, therefore schedule the proper time windows to avoid any surprises.

Once your controller is back and all the services and are UP and running again, you will be ready to build your cluster and add all the controllers (okay all as 100 but you get the idea, right?) that you want to your cluster. As you can see below, your controller doesn’t shown Localhost anymore, instead it said the IP address that you will be using to communicate with the rest of your environment, which in my case is 172.16.91.2.

I will follow almost the same procedure what I did before to add the other two vManage, press the Add vManage bottom, select the Node Persona and then put the IP address under the same subnet used on my first controller along with the username and password that I configured on the deployment stage.


After press the OK button, we will see a message saying that our second controller will be added to the cluster and it will take around 30 minutes to complete the on-boarding, in my case who is a lab environment it took around 12 minutes to complete the process, but I bet if this were a production environment it could be longer than that.

After an small coffee, our second controller is completely onboarded and fully synchronized with our first vManage, we will be able to see now we have two vManage in our Monitor – Overview page.

In the cluster page where our two controller will be shown its status as Sync as well as the IP Address, Hostname, Node Persona and UUD (serial number) of our devices is present now, if we go to the Service Reachability tab we will be able to see that all the services running on both controller are fully synchronized and are reachable each other, something that call my attention and is we don’t have any message saying something like “Hey you only have two controllers, you must have at least one more in order to be happy”, I guess I will try to find or ask more information about it.


Last but not least, I will add my third controller to the cluster following the same steps done before, Add vManage…. Select the Node Persona and then Press OK, finally wait until the reboot is completed


Almost there…. Once the last controller boot up we will be able to see all the controller ready and fully synchronized in our Cluster Management page but our job is completed yet, even if we see all the controllers up and running we need to install the certificate in all of them, in previous version of the SD-WAN controller we need to manually install the root CA certificate, but on the lasted one once we add one new controller to our vManage this one automatically will upload the root certificate to the new controller (we need to make sure that the SSHD service is allowed in our tunnel interface, our tunnel interface were configured).

Under the Certificates page we will be able to get more information about our devices in our cluster, now we should be able to see not only the hostname, furthermore we could get the system-ip, Site ID, Region ID (important when we build our vSmart cluster), Mode etc… but the important thing is the status of our certificate who is No Installed at this moment.

If you already have installed some certificated in your SD-WAN environment, you will find the following steps easy since they are the same as if you were working with one controller, that means… Generate CSR (Certificate Sign Request) hglike in the screenshot below, then sign the CSR using requesting it to your CA authority (or use your own, like I will be doing below) and the install it into the controller.
As you can see below, my first vManage have the system-ip 10.7.98.1 and I am generating the CSR which I will sign using my own Ubuntu machine (root CA in this case), you could use Window server as Root CA but this time I am using Ubuntu since I wanted to learn how to do it using OpenSSL instead of Window Certificate Authority Server.
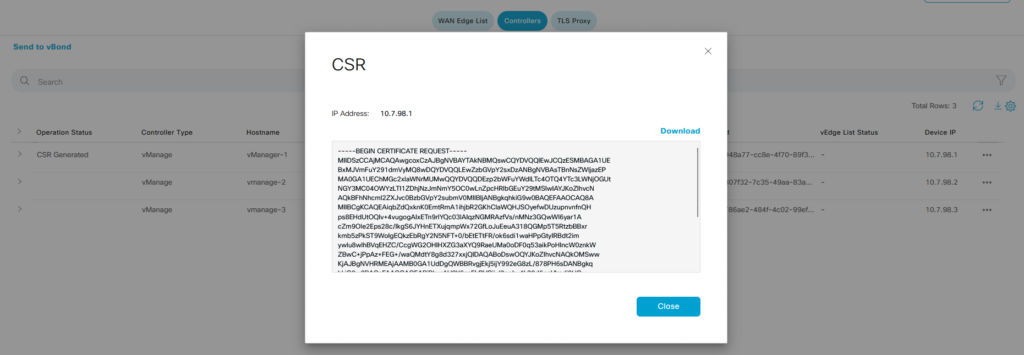
I will create another post later explaining how I configured my server but for now I briefly will explain the process to take the CSR file and sign it:
- Probably the easiest way is just copy and paste the CSR (Certificate Sign Request) information from the controller and use Vi or Nano Linux editor to create the CSR file in your Root CA server (remember on my example I am using Ubuntu)

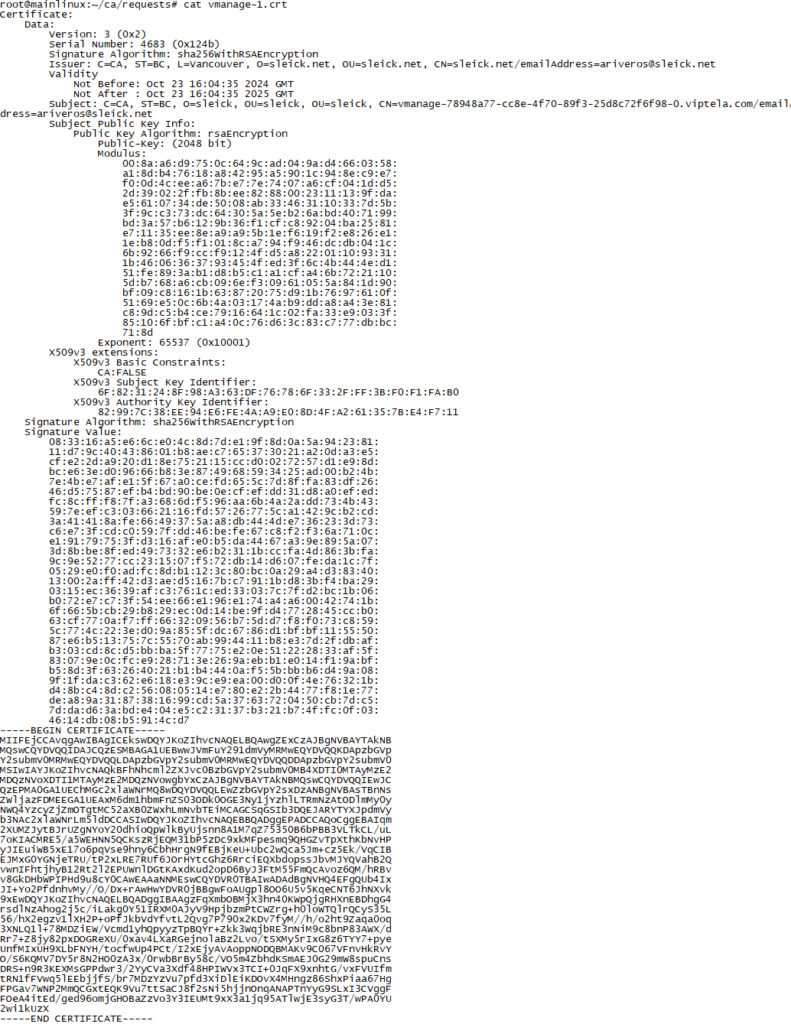
- Secondly, use openssl to sign the vManage CSR file that I created before with the root CA information. I just copy and paste the OpenSSL output to illustrate how it look like

- The resulting CRT file below will be installed in our controller, in order to do that, we have to copy the certificate and pasted it in our controller and the easiest way to achieve that is to opening that file what I did below and copy and paste its content, take in mind if you have an external CA, you will receive an email with the certificate on it.

- After copy and paste the CRT certificate under the windows and install the certificate. Once the certificate installed by the vManage, we will be able to see how the information Expiration Data, Certificate Serial and how the operation status change to vBond Updated (even if we don’t have any vbond…yet)


Finally, to complete the whole process, we need to follow the same procedure to install the certificate on the other controllers


Eureka!! Congrats!!! La conchalaloraa!!! You have now a completely functional vManage cluster in your SD-WAN environment, now you should be able to sleep without carrying because your vManage have one than friend to share all its information and if something goes wrong the other two controllers will be able to support your whole infrastructure.

You could believe in what I did and everything is going to be fine? Mmmmm… no at all but what could happen if I show you that the controllers are already synchronized uploading the vEdge file that I downloaded from Cisco, for that you will need to have your own smart account (In another post I will show you how to do that).
I will do that uploading the sleick.viptela file into the Certificate Page:
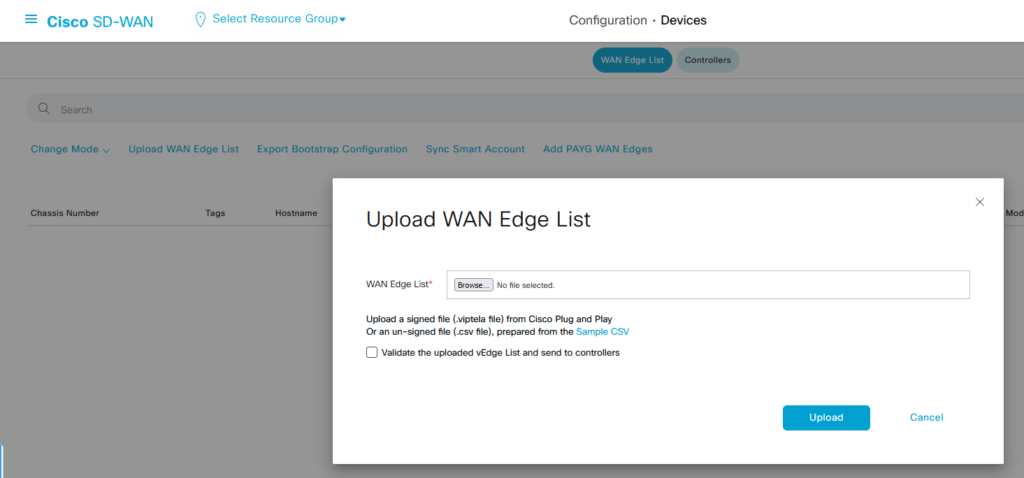

Now the serial number file has been uploaded to my first controller, as you can see below, all the CSR1000v chassis number are present and ready to be used by my future vEdge devices,
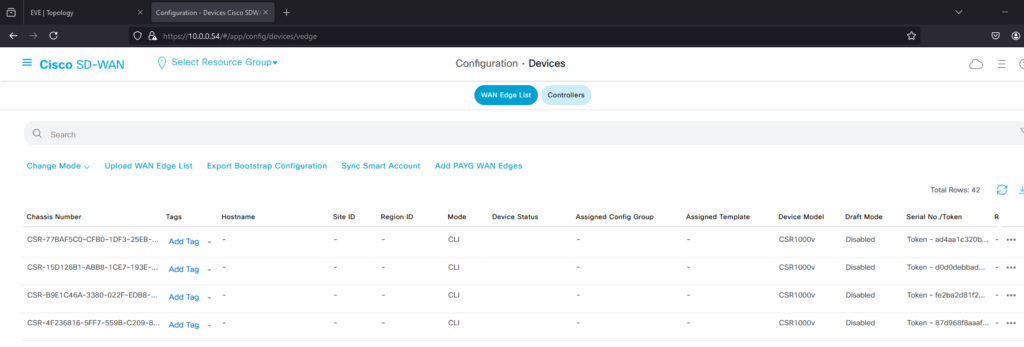
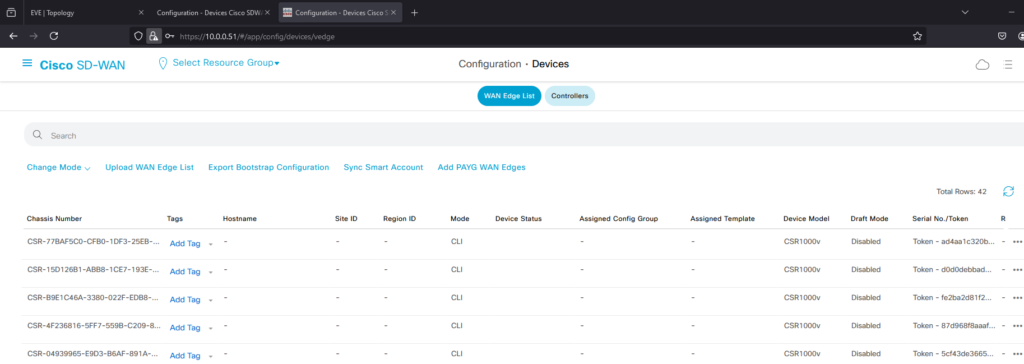
Now I will open my second controller management page…. All my devices on my local LAN use the IP 10.0.0.51 and I extended my LAN through my EVE-NG lab environment in order to be able to access to the controllers easily, my second controller is using the IP 10.0.0.51 and as you can see below, the same vEdge chassis number list is already available on it.

Very well… this has been first post and I hope that someone enjoy it… or at least resolve at least one question that person have, in the following days I will upload the part 2 related to the vBond cluster…
See you.. Nos vemos…
